MIDI Controlled Lighting: The Complete Guide to Syncing Lights with Music and Performance

Ever watch a professional light show that perfectly syncs with the music and wondered how they do it? The secret lies in MIDI controlled lighting, a technology that's revolutionized how we create dynamic visual experiences. Whether you're a DJ, band member, theater technician, or just someone who wants to add professional lighting effects to your home studio, MIDI-controlled lighting opens up a world of possibilities that goes far beyond simple on/off switches.
I've been working with MIDI controlled lighting systems for over a decade, and I can tell you that the technology has become remarkably accessible. What once required expensive, complex equipment can now be achieved with surprisingly affordable controllers and some basic knowledge. In this guide, I'll walk you through everything you need to know about MIDI controlled lighting, from the basic concepts to advanced programming techniques.
What is MIDI-controlled lighting?
MIDI (Musical Instrument Digital Interface) is a protocol developed in the 1980s that allows electronic instruments and devices to communicate with each other. When applied to lighting control, MIDI enables you to trigger specific lighting scenes, colors, and effects using keyboards, drum pads, sequencers, or even pre-programmed tracks that sync perfectly with your music.
Unlike traditional lighting control methods, MIDI-controlled lighting offers precise timing and repeatability. Each MIDI note can trigger a specific lighting scene, allowing you to create complex light shows that follow every beat, melody change, or dramatic moment in your performance.
How MIDI Lighting Control Works
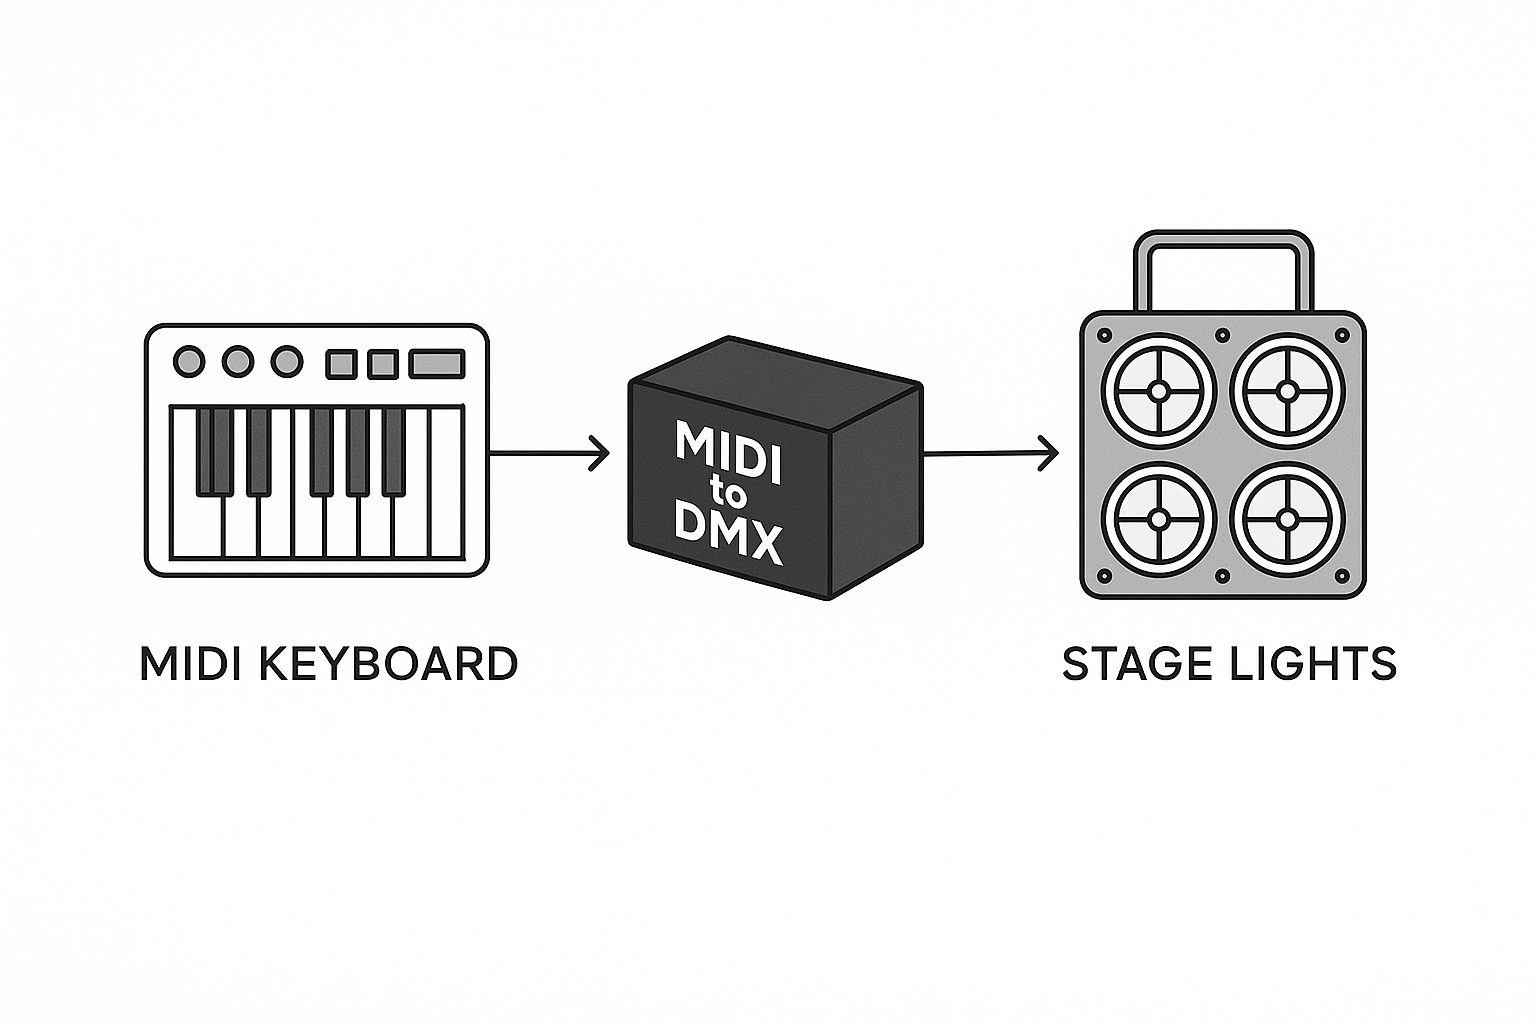
The basic principle is straightforward: MIDI messages from your controller (keyboard, sequencer, or computer) are sent to a lighting controller that translates these signals into DMX commands. DMX (Digital Multiplex) is the standard protocol for professional lighting equipment. Here's how the signal flow typically works:
- MIDI Source: Your keyboard, drum pad, or sequencer sends MIDI data
- MIDI to DMX Controller: Receives MIDI signals and converts them to DMX
- DMX Lights: Respond to the DMX commands with specific colors, movements, or effects
The beauty of this system is its flexibility. You can control everything from simple LED strips to complex moving head fixtures, all through the same MIDI interface you might already use for music production.
Benefits of MIDI Controlled LED Lights
Working with MIDI-controlled LED lights offers several advantages over traditional lighting systems:
Precision Timing: Every lighting change can be programmed to occur at exactly the right moment, down to millisecond accuracy.
Repeatability: Once programmed, your light show will perform identically every time. This is crucial for touring acts or installations that need consistency.
Integration with Music Production: If you're already using a DAW (Digital Audio Workstation) for music production, adding MIDI lighting control is seamless. You can program your lights alongside your music tracks.
Cost-Effectiveness: Modern MIDI to DMX controllers like the DMX512 Controller mentioned earlier are surprisingly affordable, with professional-grade options available for under $150.
Scalability: Start with a few lights and expand your system as needed. MIDI can control hundreds of channels simultaneously.
Essential Equipment for MIDI Controller Lighting
To get started with MIDI-controlled lighting, you'll need a few key pieces of equipment:
MIDI Controller
Any MIDI-capable device will work, including:
- MIDI keyboards
- Drum pads
- MIDI foot controllers
- Computer with a MIDI interface
- iPad or tablet with MIDI apps
MIDI to DMX Interface
This is the crucial link between your MIDI world and lighting fixtures. Popular options include:
- DMX512 controllers with MIDI input
- USB to DMX interfaces with MIDI support
- Dedicated lighting consoles with MIDI capabilities
Compatible Lighting Fixtures
Most modern DMX lights work perfectly with MIDI control:
- LED par cans
- Moving head lights
- LED strips with DMX control
- Fog machines with DMX input
- Laser systems
Cables and Connections
- Standard 5-pin MIDI cables
- XLR cables for DMX connections
- Power cables for your fixtures
Setting Up Your MIDI Controlled Light System
Getting your first MIDI lighting setup running is easier than you might think. Let me walk you through the basic process I use when configuring a new system.
Step 1: Physical Connections
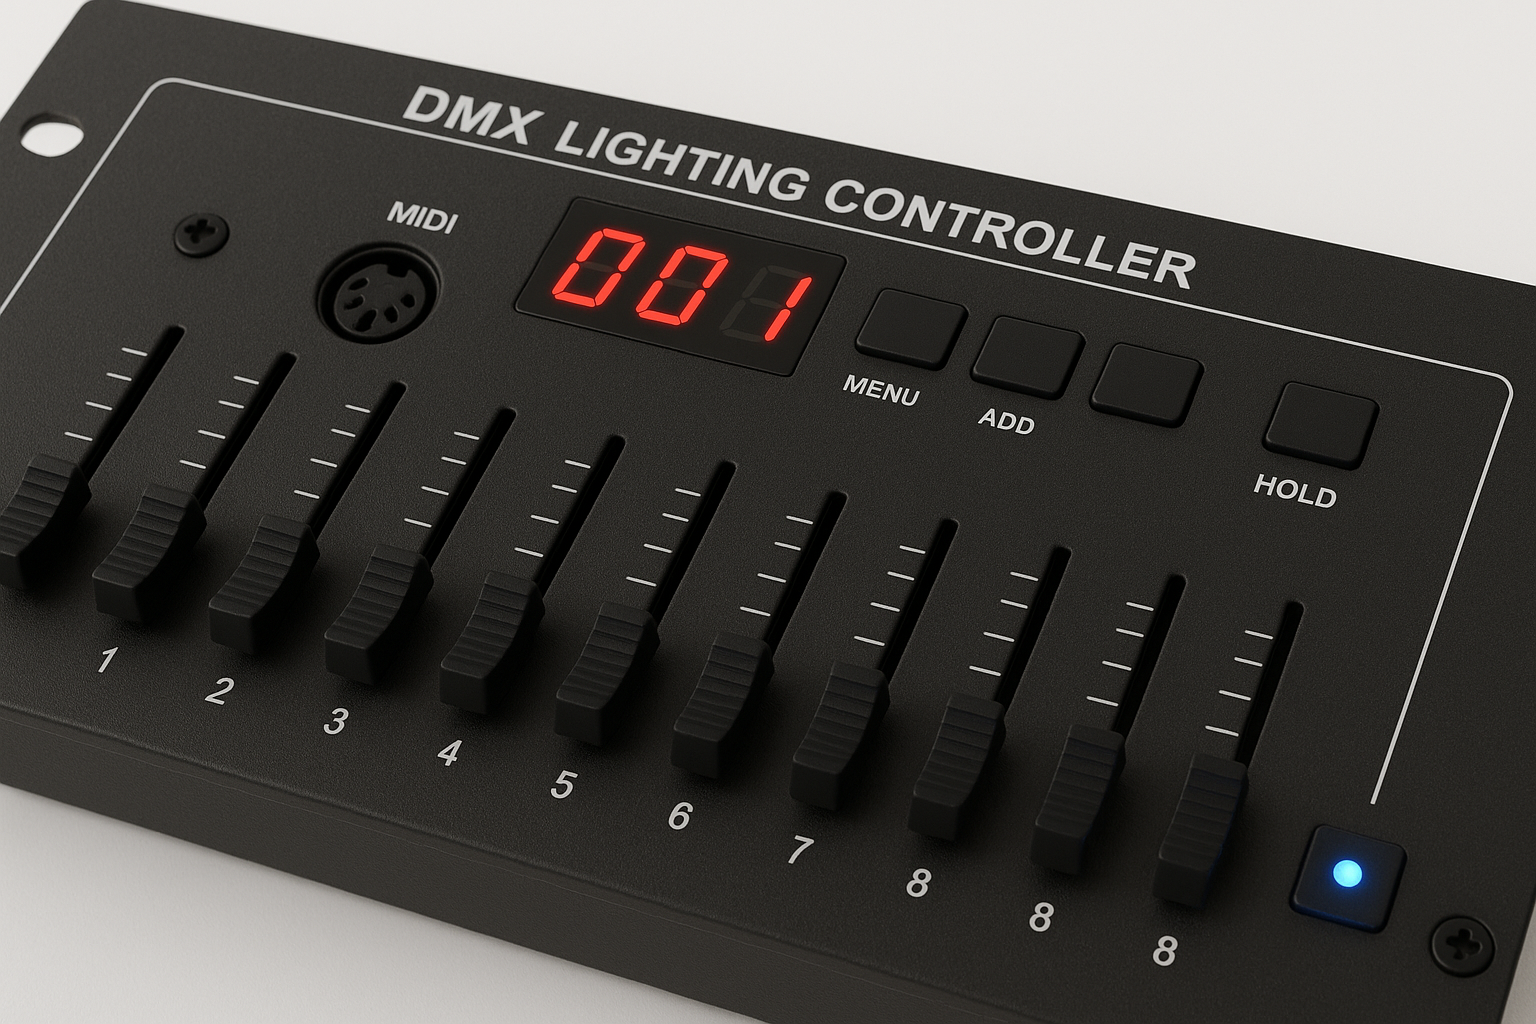
First, connect your MIDI source to the MIDI input on your lighting controller. Most controllers like the Chauvet Obey 40 or similar DMX512 controllers, have a MIDI IN port on the back panel. Use a standard 5-pin MIDI cable for this connection.
Next, connect your DMX output from the controller to your first light fixture. DMX uses a daisy chain configuration, so you'll run from the controller to the first light, then from that light to the next, and so on.
Step 2: MIDI Channel Configuration
MIDI uses 16 channels, and your controller and lighting interface must be set to the same channel. Most lighting controllers default to channel 1, but you can change this if needed. On the Obey 40 mentioned in the video transcript, there's a dedicated MIDI button for changing channels.
Step 3: Programming Scenes
Before you can trigger lights with MIDI, you need to program scenes into your lighting controller. A scene is a preset combination of light settings, which lights are on, their colors, positions (for moving lights), and intensity levels.
Most controllers allow you to program multiple banks of scenes. For example, you might have:
- Bank 1: Basic color washes
- Bank 2: Chase sequences
- Bank 3: Strobe effects
- Bank 4: Moving light positions
Step 4: Mapping MIDI Notes to Scenes
This is where the magic happens. Each MIDI note corresponds to a specific scene or chase in your lighting controller. Typically:
- MIDI note 0 triggers Scene 1 in Bank 1
- MIDI note 1 triggers Scene 2 in Bank 1
- And so on...
Higher MIDI notes usually access scenes in subsequent banks, though the exact mapping varies by controller model.
Programming Techniques for MIDI Lighting Controllers
Creating compelling light shows requires both technical knowledge and artistic vision. Here are some techniques I've developed over the years of programming:
Using Sequencers for Complex Shows
While you can trigger lights live from a keyboard, using a sequencer opens up incredible possibilities. Software like Logic Pro, Ableton Live, or even iPad apps like Meteor allow you to program intricate lighting sequences that sync perfectly with your tracks.
I typically start by loading my audio track into the sequencer, then program MIDI notes on a dedicated lighting track. This visual approach makes it easy to see exactly when each lighting change will occur relative to the music.
Creating Musical Transitions
One of the most effective techniques is matching lighting transitions to musical elements:
- Program color changes on chord progressions
- Trigger strobes on drum hits
- Use slow fades during quiet passages
- Create blackouts for dramatic effect
Building Intensity Curves
Rather than using static scenes, consider programming gradual changes that build intensity throughout a song. Start with subtle lighting during verses, then gradually increase brightness and movement during choruses, culminating in a full light show during the final chorus or outro.
Advanced MIDI Controlled Video Integration
Modern MIDI systems aren't limited to just controlling lights. Many performers now integrate MIDI-controlled video elements into their shows. Video mapping software like Resolume or VDMX can receive MIDI commands to trigger video clips, effects, and transitions in sync with your lighting.
This integration creates immersive experiences where lights, video, and music work together seamlessly. I've seen this used effectively in everything from small club performances to massive stadium shows.
DMX Controlled Lighting vs MIDI: Understanding the Difference
While we've been discussing MIDI controlled lighting, it's important to understand how it relates to DMX controlled lighting. DMX is the actual protocol that controls the lights, while MIDI is simply one way to trigger DMX commands.
You can control DMX lights through:
- Dedicated lighting consoles
- Computer software
- Mobile apps
- MIDI interfaces (our focus here)
MIDI offers unique advantages for musicians because it integrates directly with musical equipment and concepts you already understand. If you can play a keyboard or program beats, you can control lights.
Troubleshooting Common Issues
Even with modern equipment, you might encounter some challenges. Here are solutions to common problems:
Lights Not Responding to MIDI
- Check the MIDI channel settings on both devices
- Verify cable connections
- Ensure scenes are properly programmed
- Test with a simple MIDI monitor to confirm signal flow
Timing Issues
- Account for MIDI latency in your DAW
- Use hardware MIDI interfaces for better timing
- Consider DMX refresh rates when programming fast sequences
Inconsistent Triggering
- Check for MIDI note conflicts
- Ensure your power supply can handle all fixtures
- Verify DMX termination on long cable runs
Product Recommendations
Based on my experience, here are some excellent options for getting started:
Budget-Friendly Option
The DMX512 DJ Controller 384CH (currently $119 on Amazon) offers incredible value. With 384 DMX channels, it can control up to 30 programmable scenes across 8 banks. The built-in MIDI support makes it perfect for musicians looking to add lighting to their setup.
Professional Grade
For larger installations, the Chauvet DJ Obey 40 provides more advanced features, including:
- 192 DMX channels
- 240 scenes across 30 banks
- Built-in chase sequences
- Both MIDI and audio triggering options
Software Solutions
Don't overlook software-based controllers. Programs like QLC+ (free and open-source) or Lightkey (Mac) can turn your computer into a powerful lighting console with MIDI support.
The Future of MIDI Controlled Lighting
The industry continues to evolve rapidly. Recent developments include:
Wireless MIDI Integration
New wireless MIDI protocols eliminate cable runs, making setup faster and more flexible.
AI-Assisted Programming
Some modern controllers use artificial intelligence to suggest lighting patterns based on audio analysis.
Pixel Mapping
Advanced LED fixtures now support individual pixel control, creating video-like effects through MIDI commands.
Conclusion
MIDI-controlled lighting bridges the gap between music and visual performance, offering musicians an intuitive way to create professional light shows. Whether you're adding atmosphere to a home studio, enhancing live performances, or creating installation art, MIDI lighting control provides the tools you need.
The technology has become remarkably accessible, with professional-grade controllers available at reasonable prices. Combined with the wealth of compatible fixtures and software options, there's never been a better time to explore MIDI-controlled lighting.
Remember, the key to great lighting isn't just technical knowledge, it's understanding how light can enhance and complement your music. Start simple, experiment with different approaches, and gradually build your skills. Soon you'll be creating light shows that captivate audiences and elevate your performances to new heights.
Frequently Asked Questions
Can I use any MIDI keyboard to control lights?
Yes, any MIDI keyboard or controller will work for lighting control. The key requirement is that your lighting controller must have MIDI input capability. Most modern DMX controllers include MIDI support, making integration straightforward.
How many lights can I control with MIDI?
The number depends on your DMX controller's channel capacity. Basic controllers handle 192-384 channels, while professional units manage 512 or more. Since most LED fixtures use 3-7 channels each, you can typically control dozens of lights simultaneously.
Do I need special software for MIDI lighting control?
Not necessarily. While software can enhance your capabilities, many hardware controllers work standalone with MIDI input. However, using a DAW or dedicated lighting software provides more sophisticated programming options and easier visualization of your light shows.
What's the difference between sound-activated and MIDI-controlled lights?
Sound-activated lights respond to audio volume and frequency but lack precise control. MIDI-controlled lights trigger specific scenes at exact moments, offering repeatability and complex programming. As mentioned in the tutorial, sound activation can be unpredictable, while MIDI provides consistent, professional results.
Can I retrofit existing lights for MIDI control?
If your lights accept DMX input, you can control them via MIDI using an appropriate interface. For non-DMX lights, you'll need DMX-compatible dimmers or switches. Many LED strips and conventional fixtures can be adapted using DMX relay packs.
What's the learning curve for MIDI lighting programming?
If you're already familiar with MIDI for music, the transition is relatively smooth. Basic scene triggering can be learned in an afternoon. Advanced programming with sequencers and complex cues might take a few weeks to master, but the fundamental concepts are straightforward.